Did you know you can get Hostinger Plans Without Taxes at a lower price in 2026?
In this article, we reveal the secret method many professionals use to legally cut their hosting costs.

What is Hostinger?
![]()
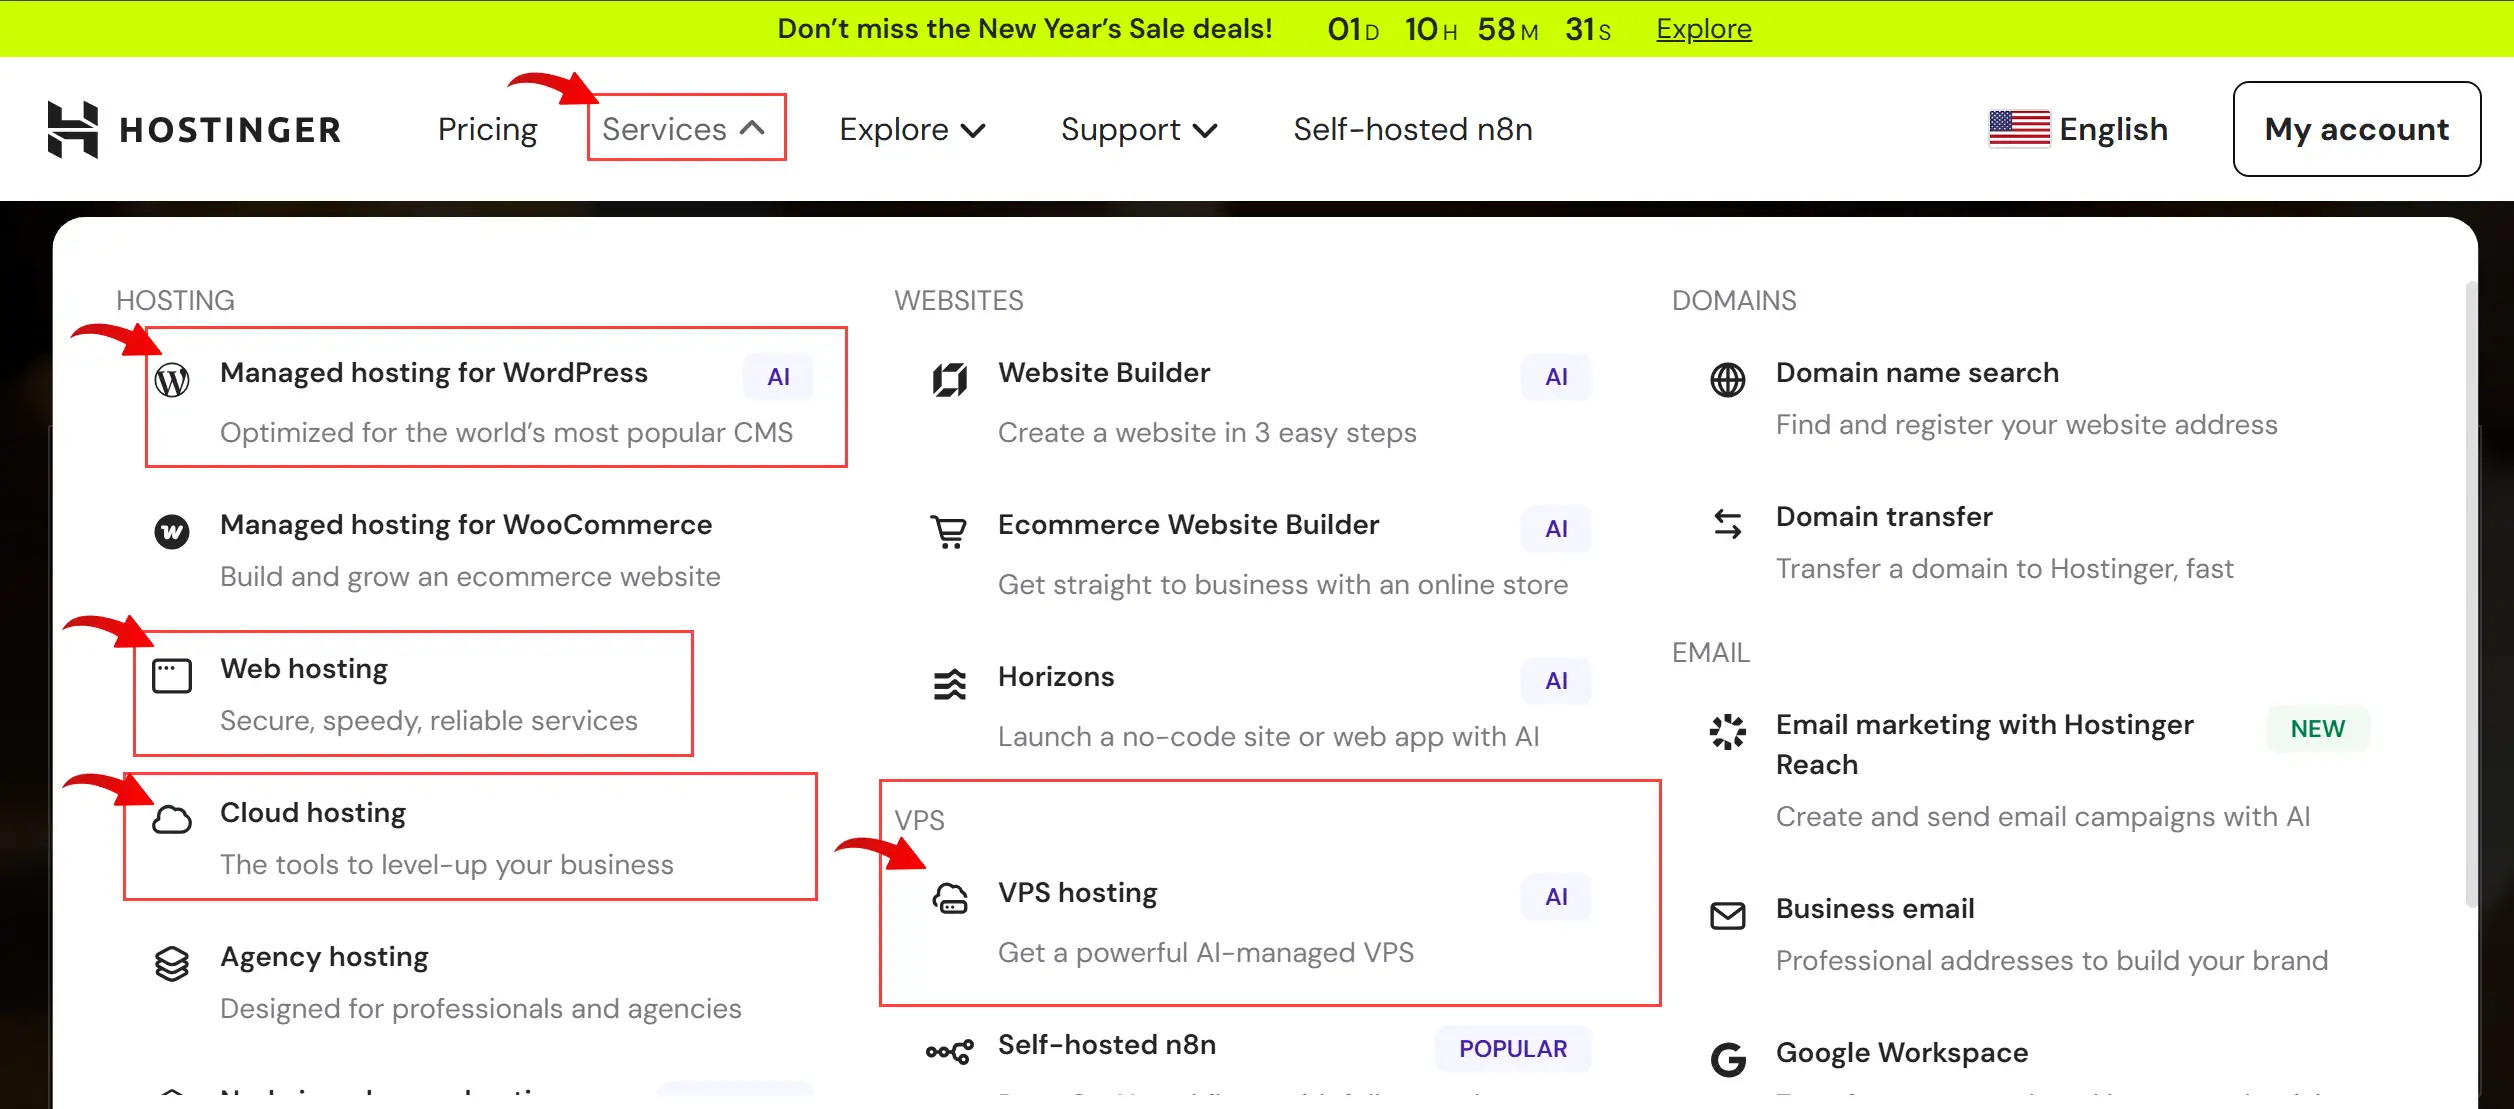
Hostinger is a global web hosting company that offers competitive hosting services, including:
-
Shared Hosting: for small and medium websites.
-
VPS Hosting: for sites that need more resources and full server control.
-
Managed WordPress Hosting: to run WordPress sites quickly and securely.
-
Cloud Hosting: for high-performance websites with scalable resources and better reliability.
Hostinger is known for fast performance, 24/7 customer support, and lower prices compared to many other hosting companies.
Why choose Hostinger over other hosting?
-
Competitive Prices: Hostinger’s plans are usually cheaper than many other companies, making it an excellent choice for beginners and small businesses.
-
Fast Performance: Optimized servers and high loading speeds enhance visitor experience and support better SEO rankings.
-
24/7 Support: A team available at all times to help you solve any issues quickly and professionally.
-
Multiple Hosting Options: From shared hosting to VPS and cloud hosting, there are options to suit different website needs.
-
Ease of Use: A simple and user-friendly control panel, even for beginners, with tools to quickly install WordPress.
How to Get Hostinger Plans Without Taxes ?
Follow these steps below to Get Hostinger Plans Without Taxes:
1- Visit Hostinger and Activate the Tax Discount
- click here to go to Hostinger and enable the special tax-free option to reduce the final price.
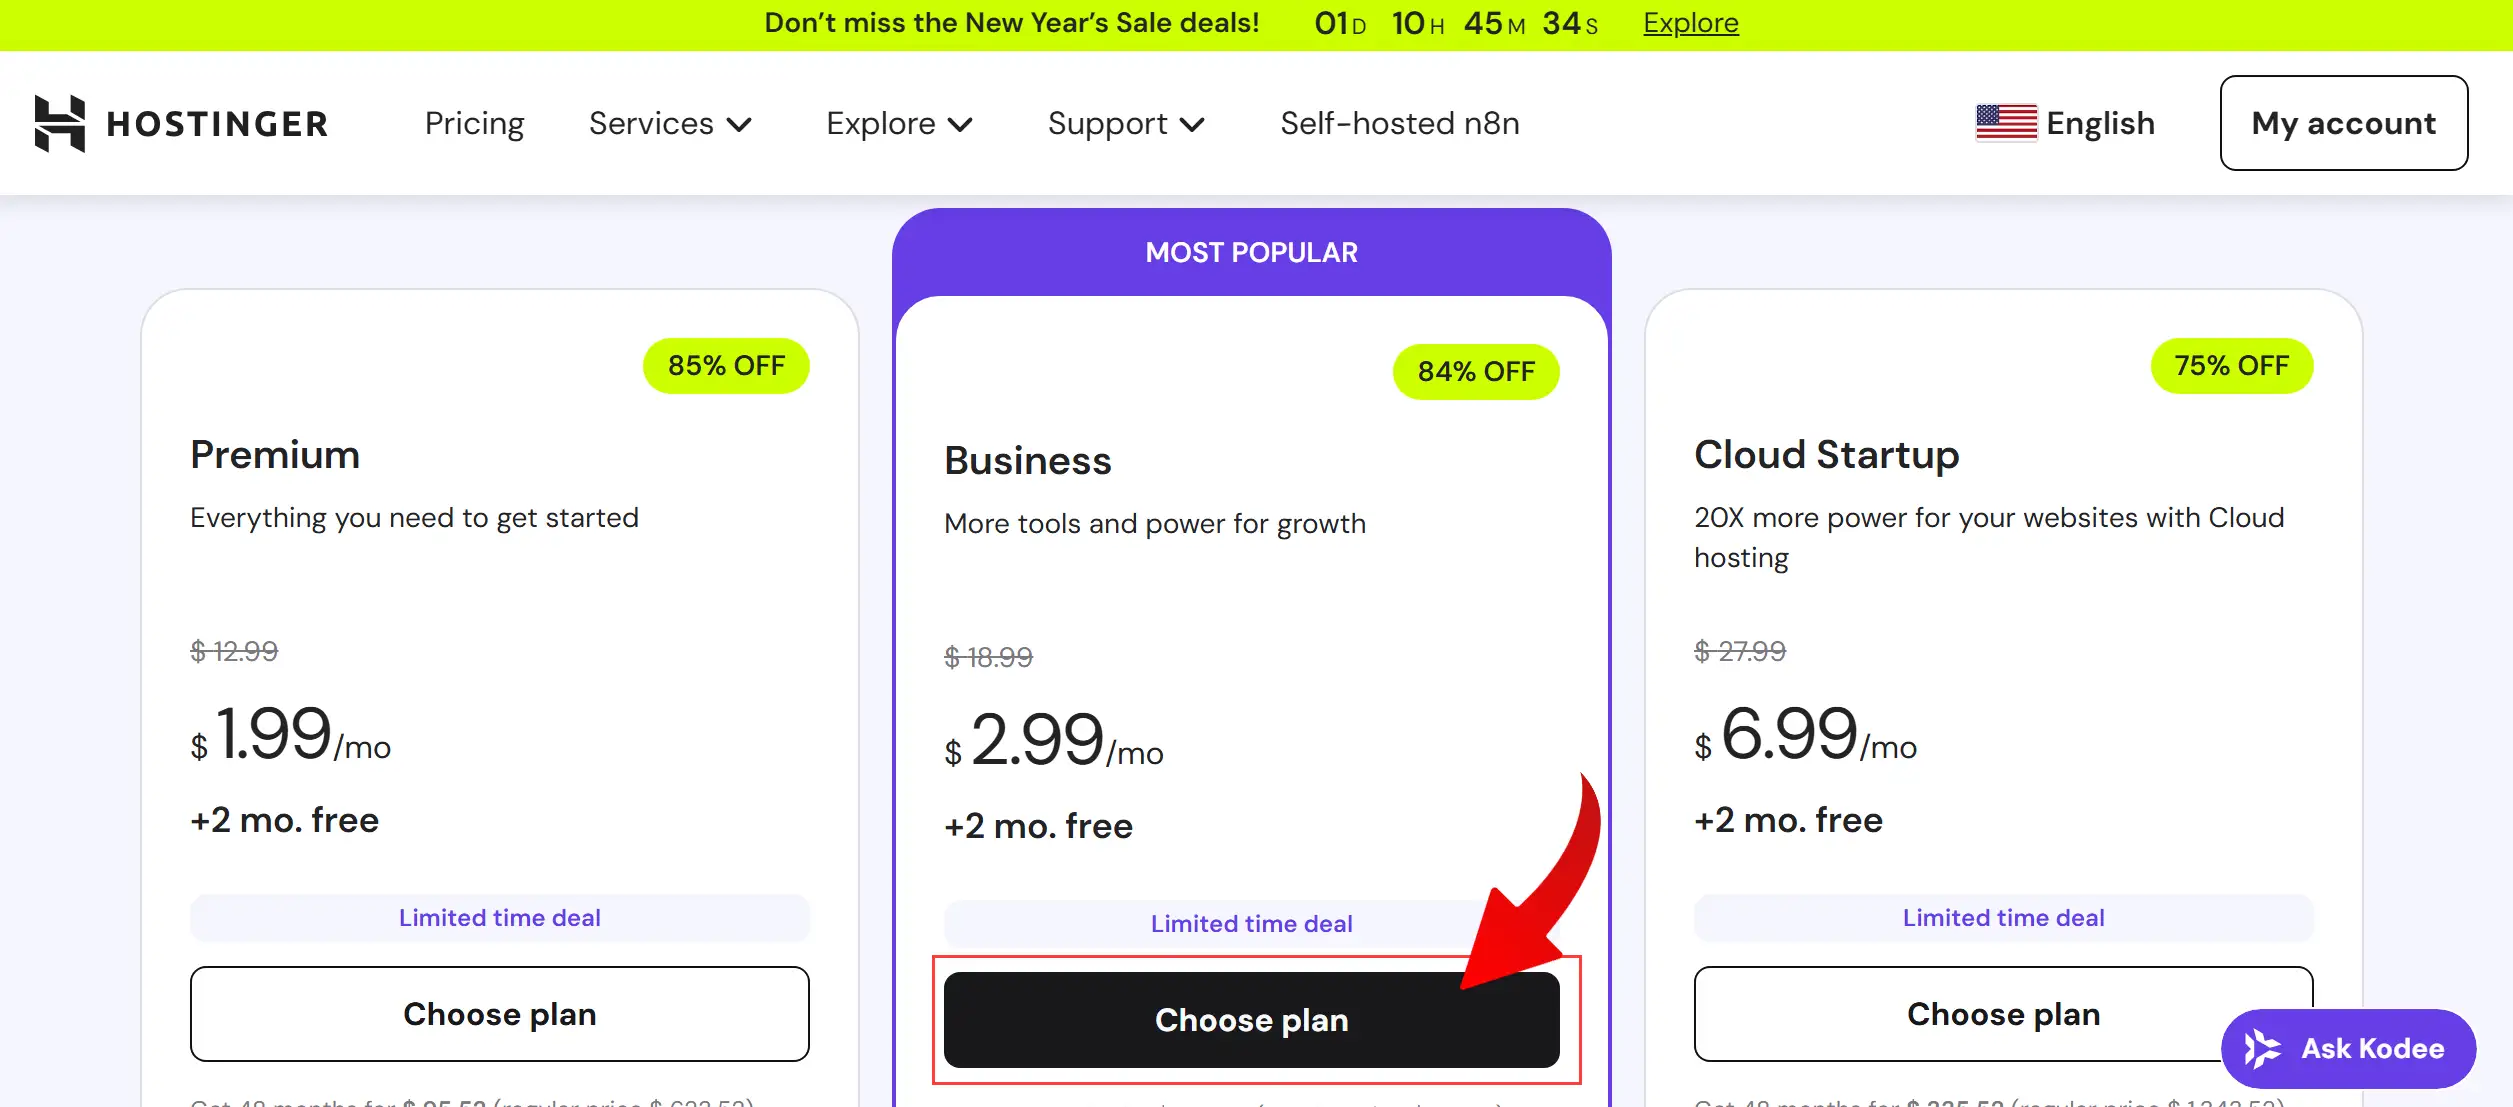
2- Select Your Hosting Type
-
Choose the type of hosting that suits your needs: Shared, VPS, or Cloud. Each type offers different performance and resources.
💡 Tip: Not sure which plan is right for you? Click here to read a full Hostinger review and choose with confidence!
3- Pick the Plan You Need
-
Review the available plans within your chosen hosting type and select the one that fits your website requirements.
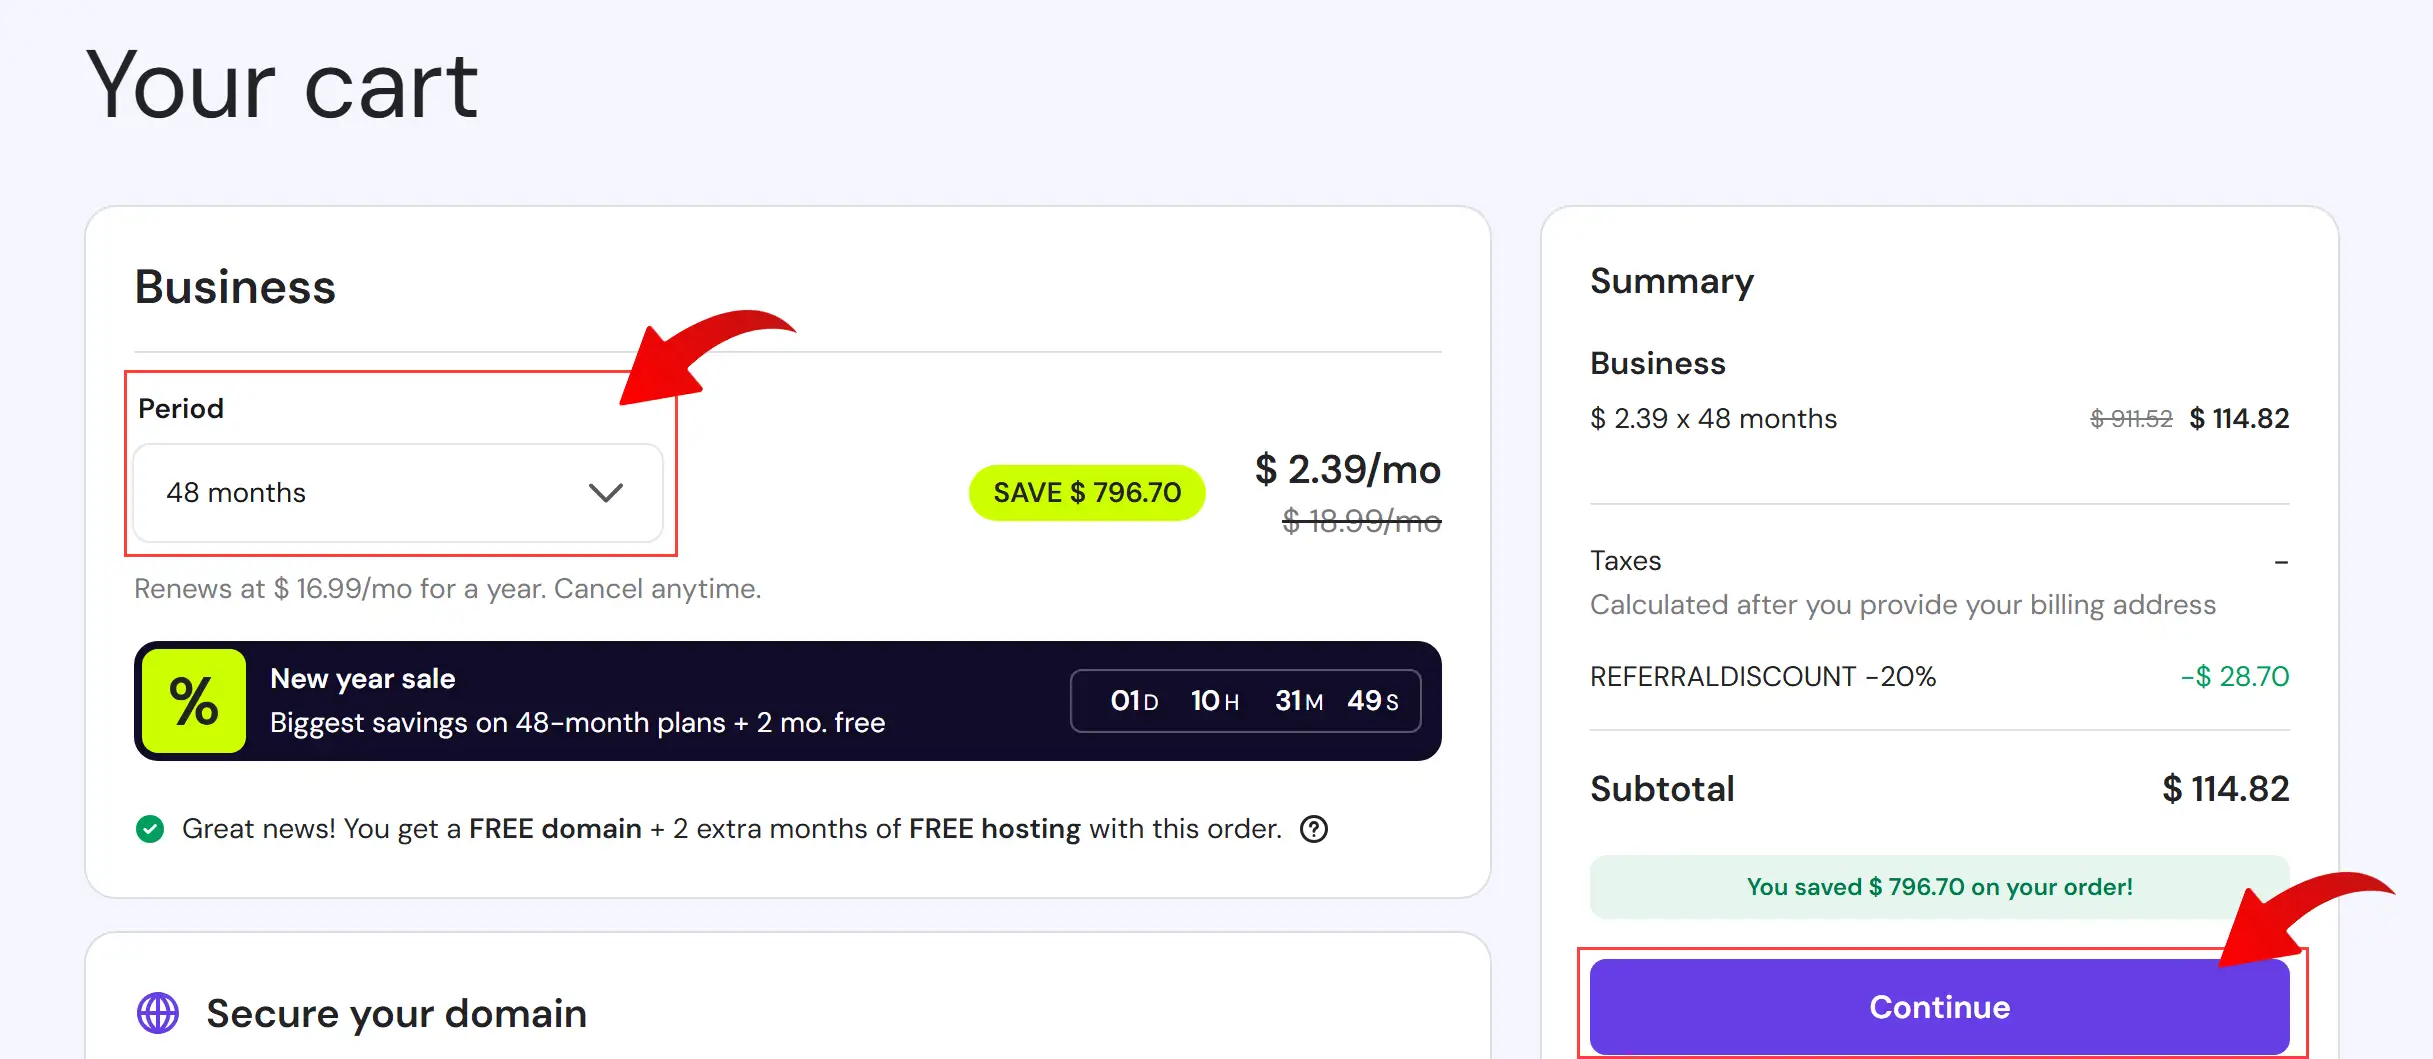
4- Choose the Billing Period
-
Decide how long you want to subscribe—monthly, yearly, or multi-year plans—longer periods often come with bigger discounts.
5- Create Your Account
-
Sign up for a Hostinger account using your email or social login to proceed with your purchase.

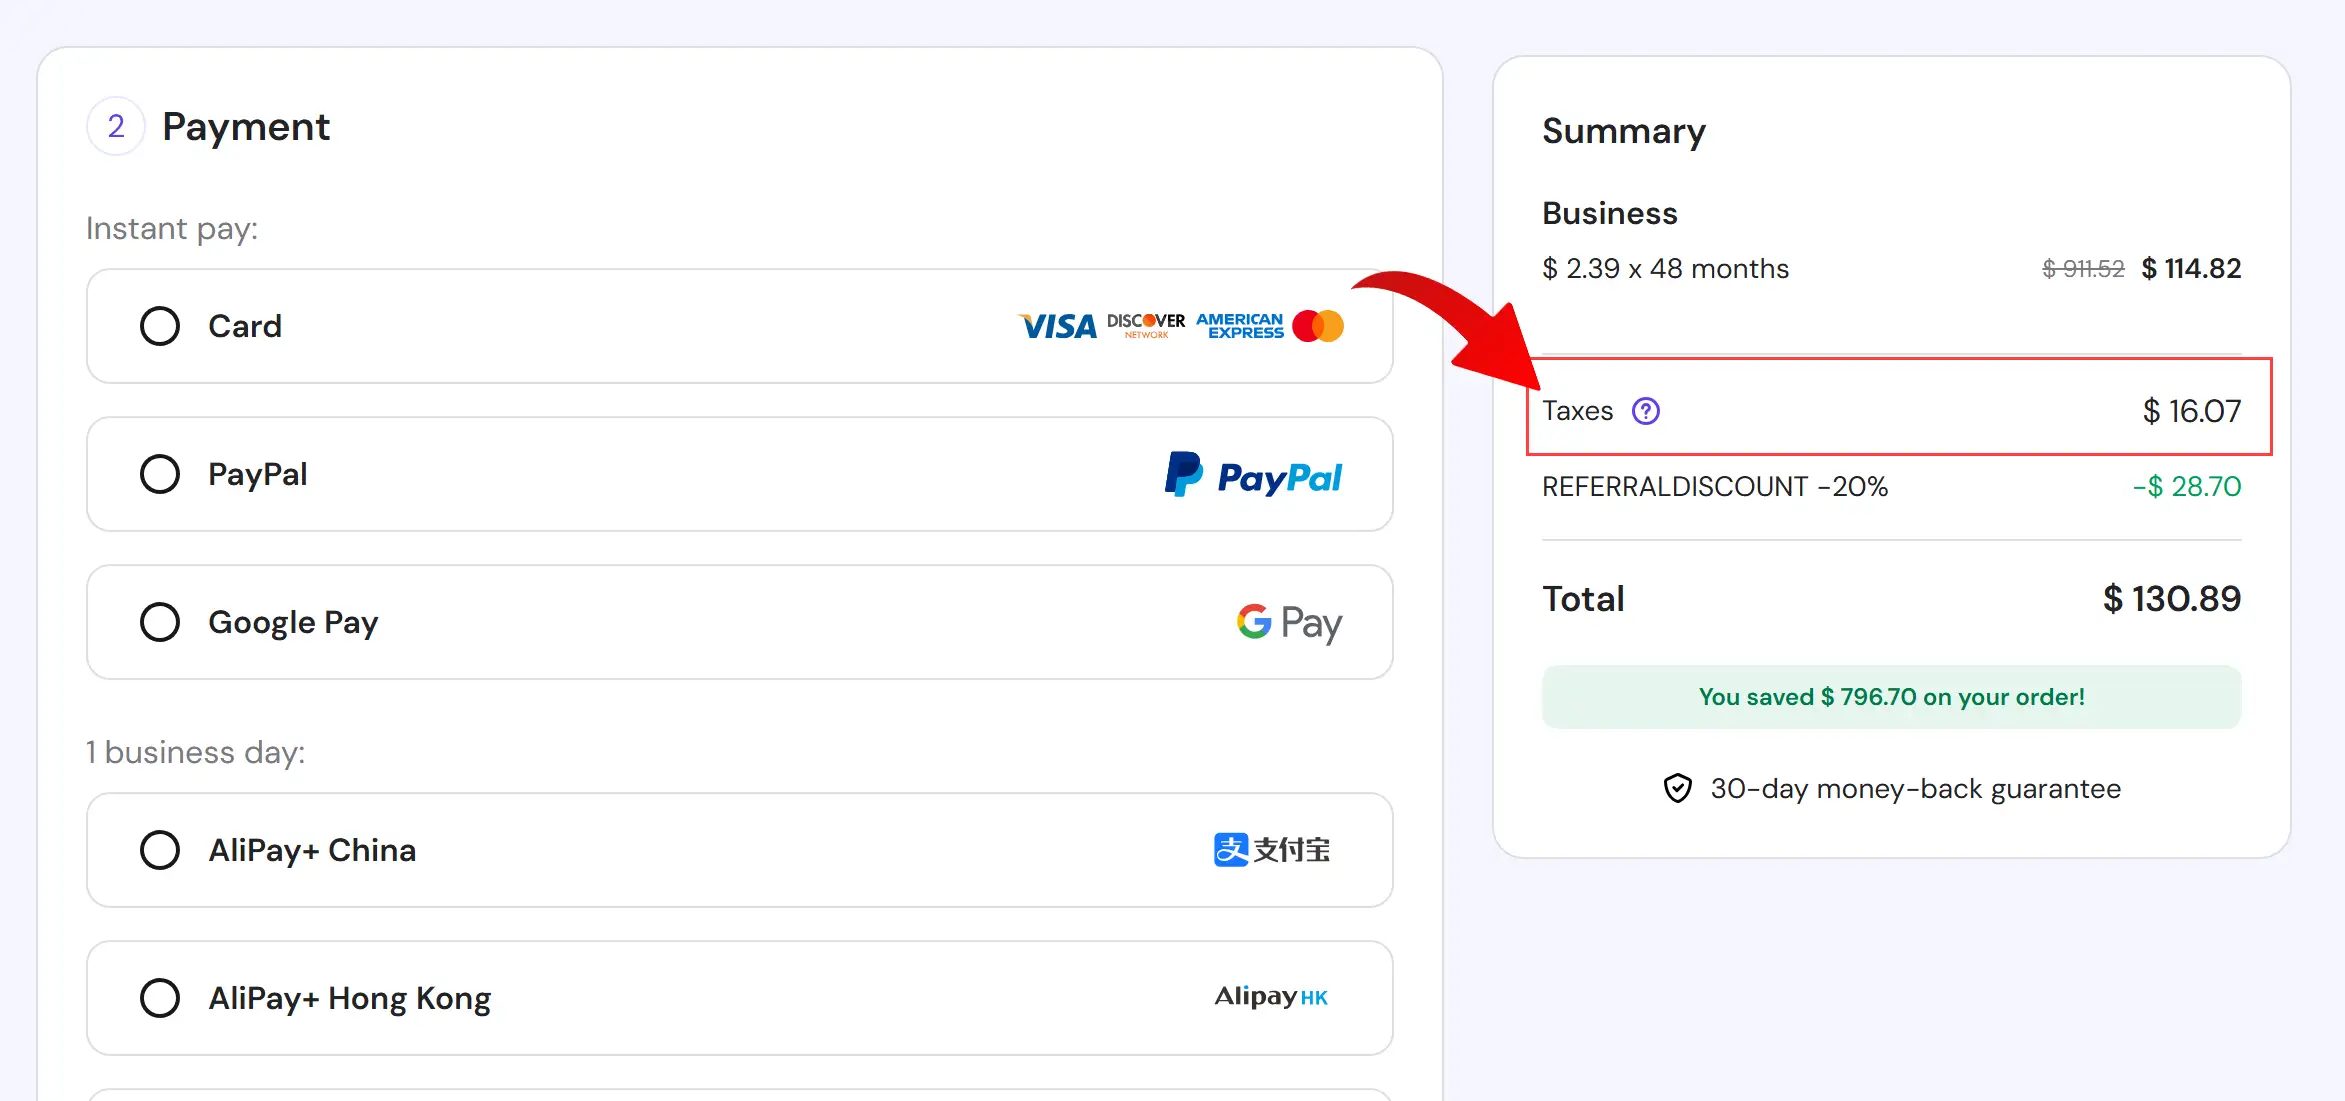
6- Review the Billing Form
-
At this stage, the taxes might not appear immediately. If you click “Continue,” taxes may be calculated based on your current country.
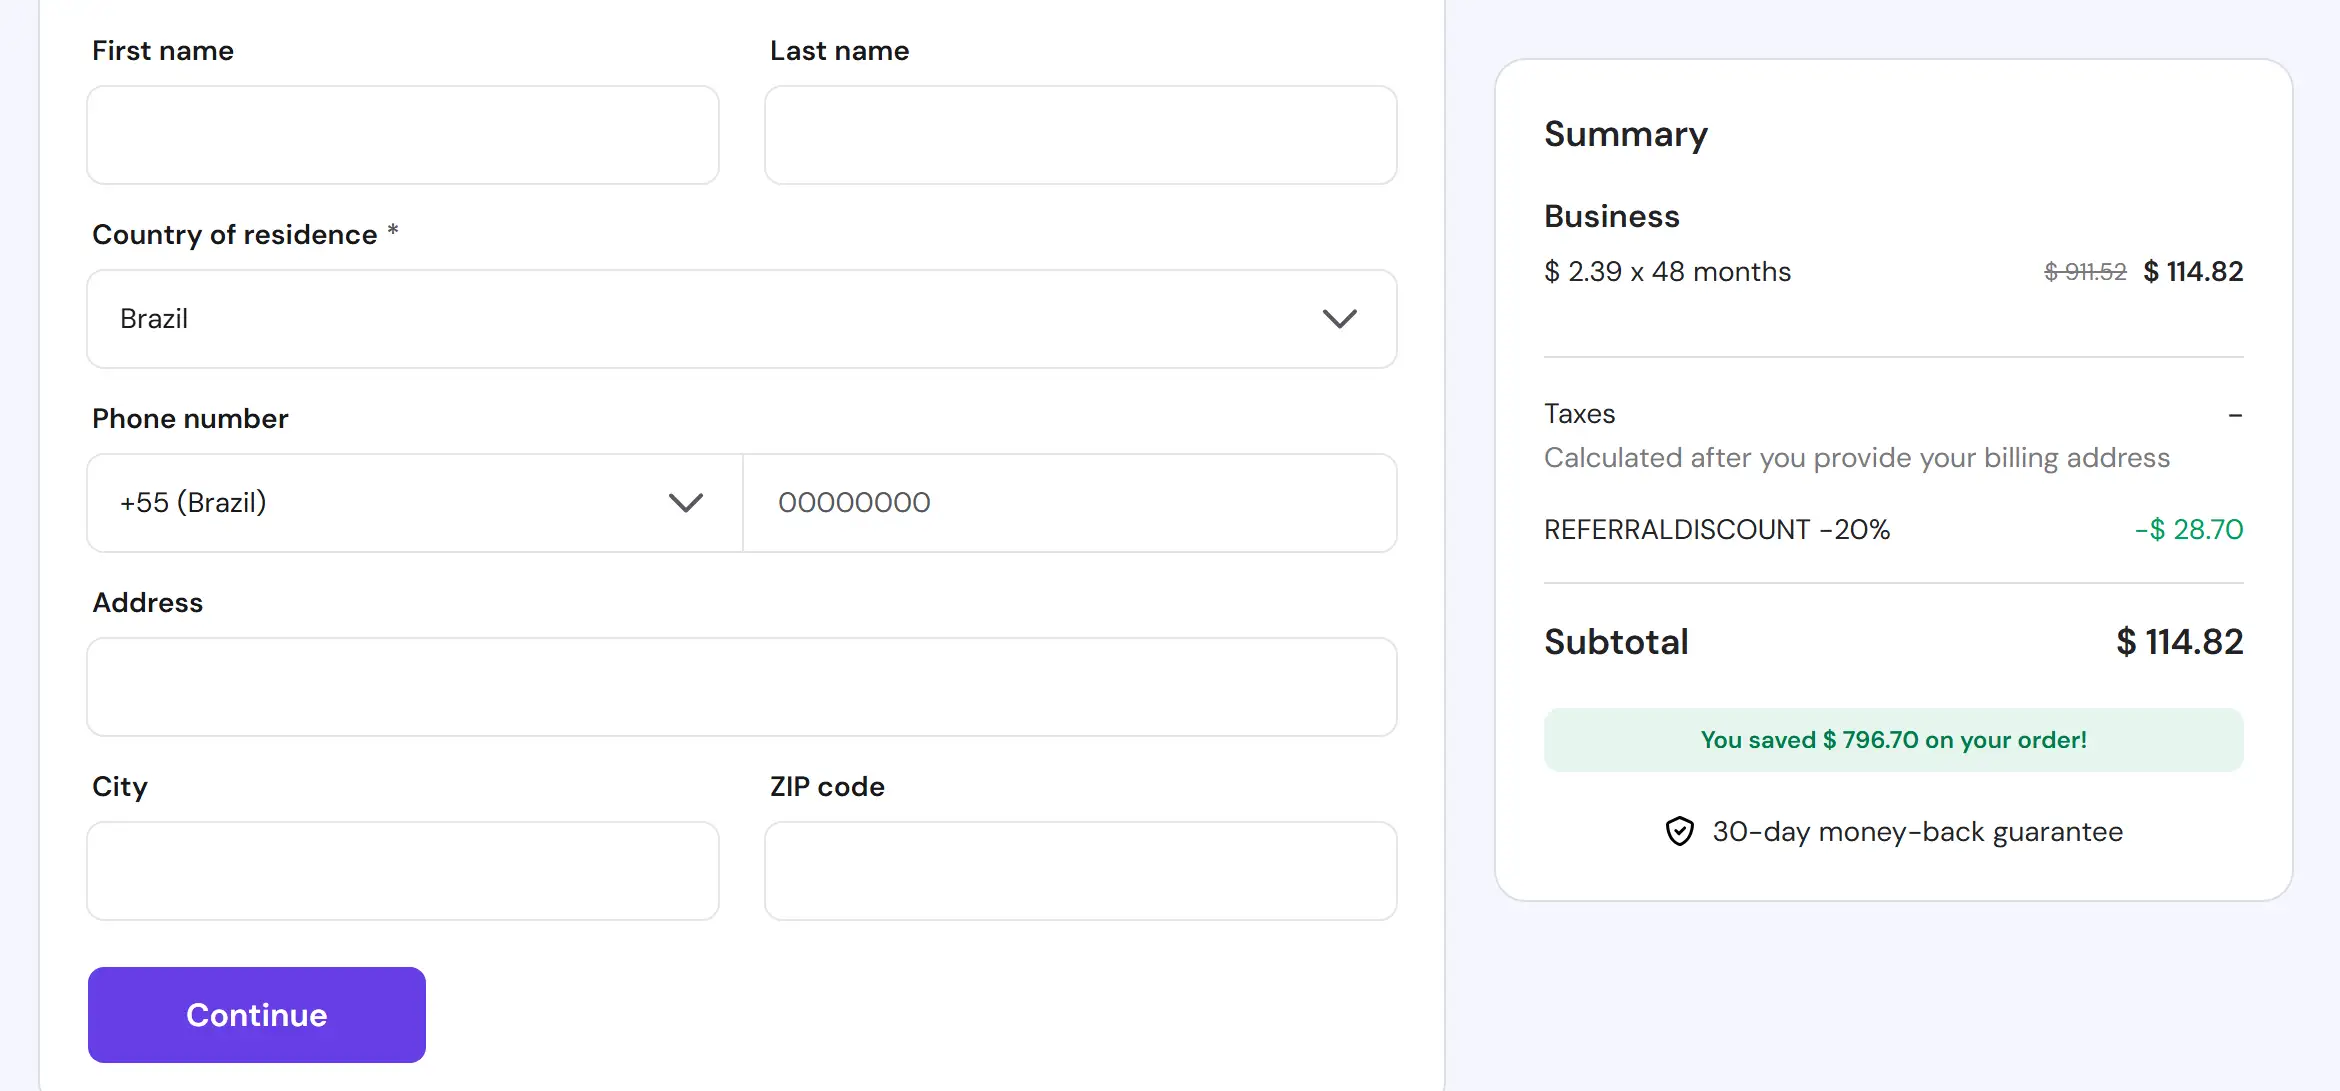
💡 Note: At this step, taxes may be applied based on your country.
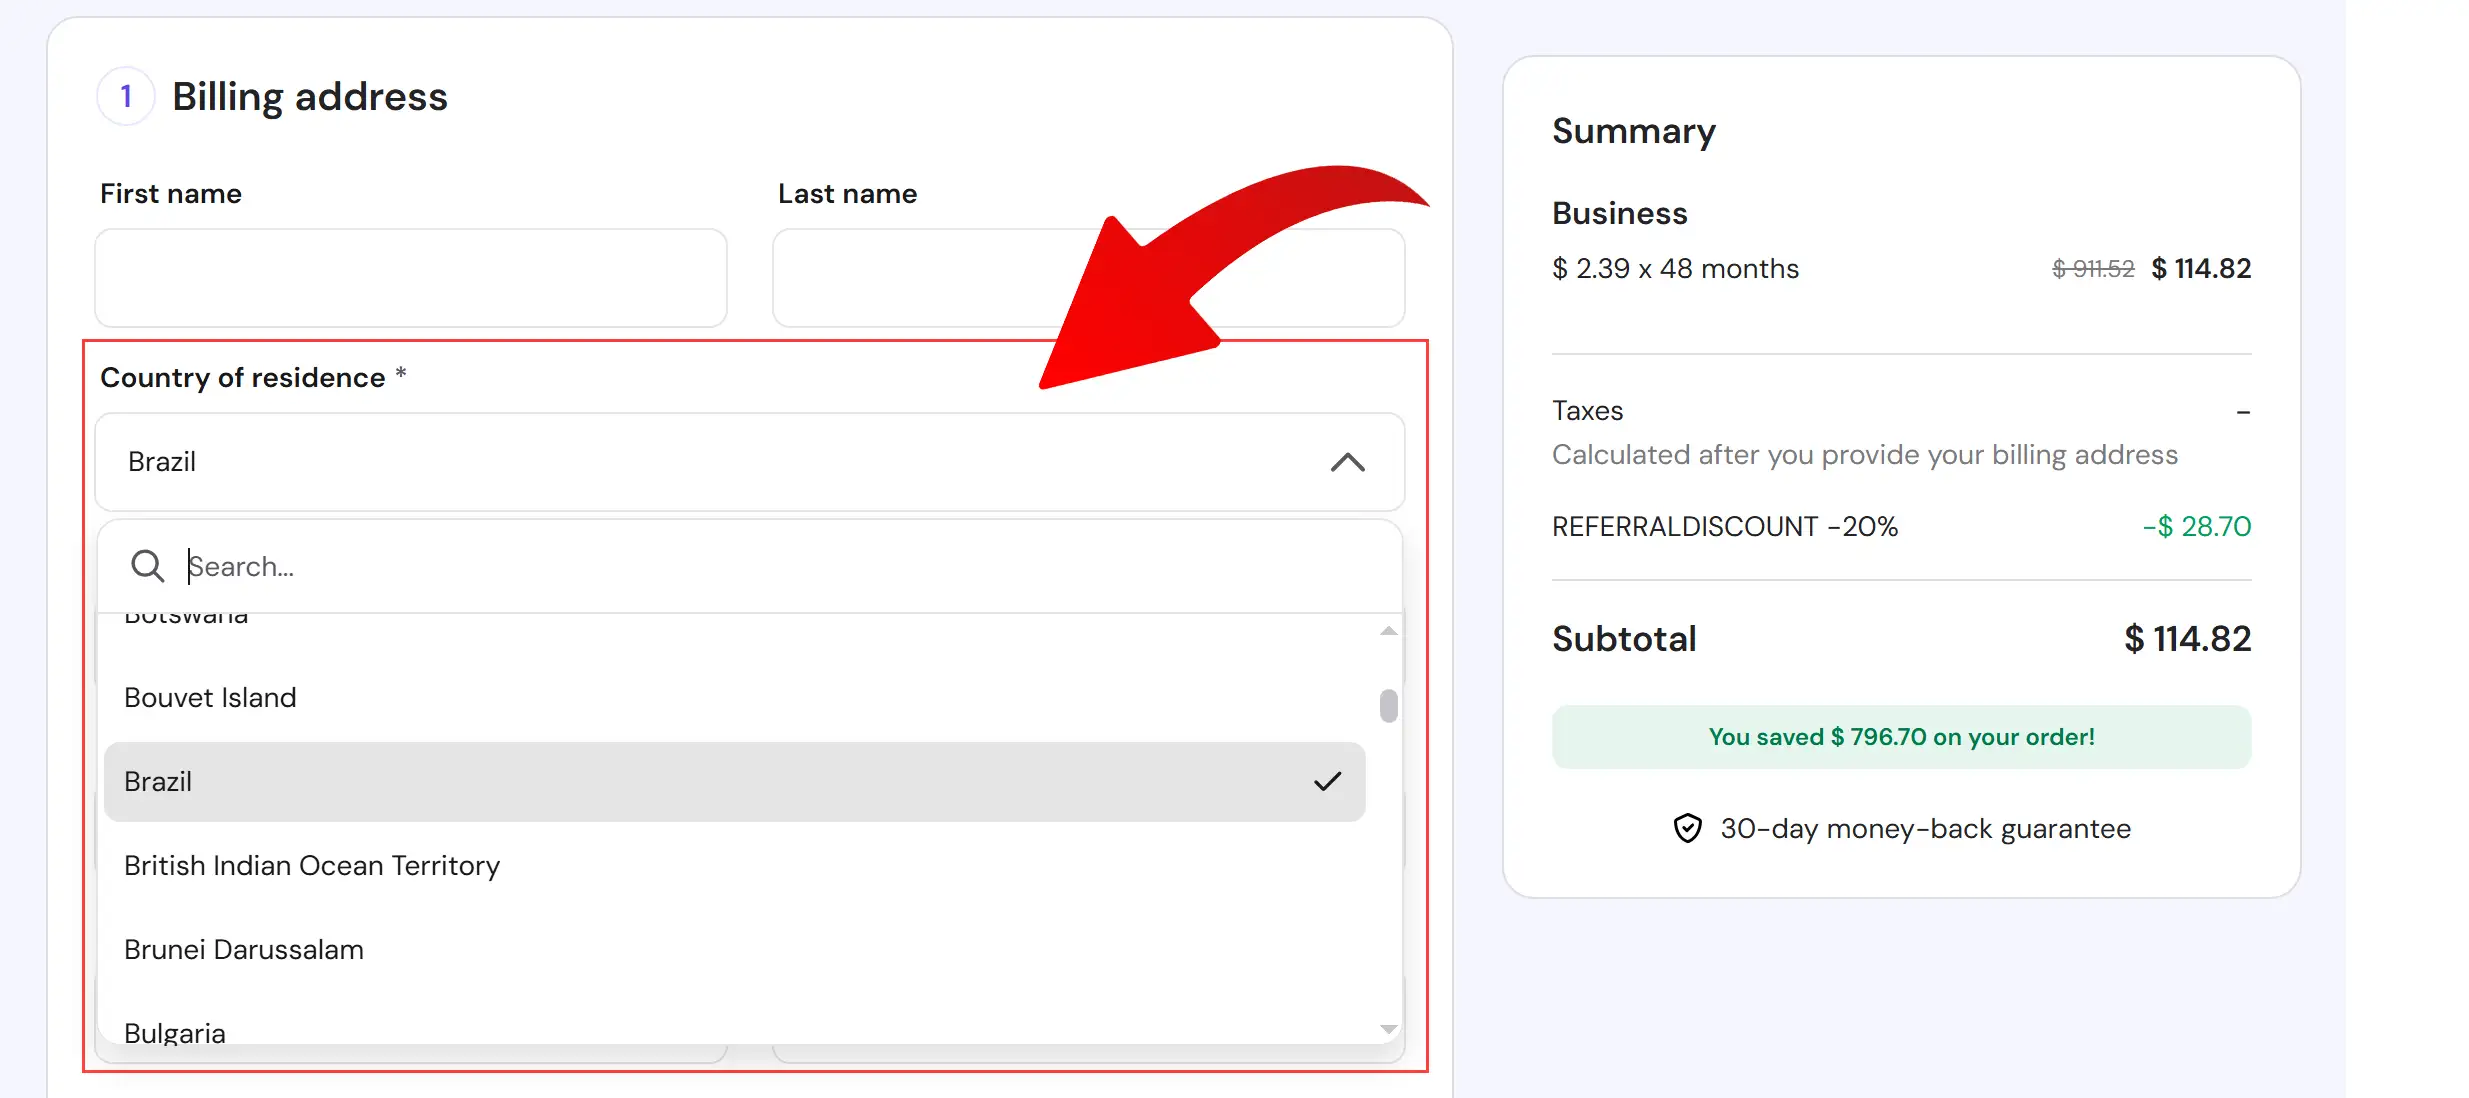
7- Avoid Taxes by Changing Your Country
-
Go back to the country selection and choose a country where taxes are not applied. This ensures your plan remains tax-free.
8- Finalize Your Purchase
-
Click “Continue” again, and you will see that the taxes have been removed, allowing you to pay only the base price for your hosting plan.
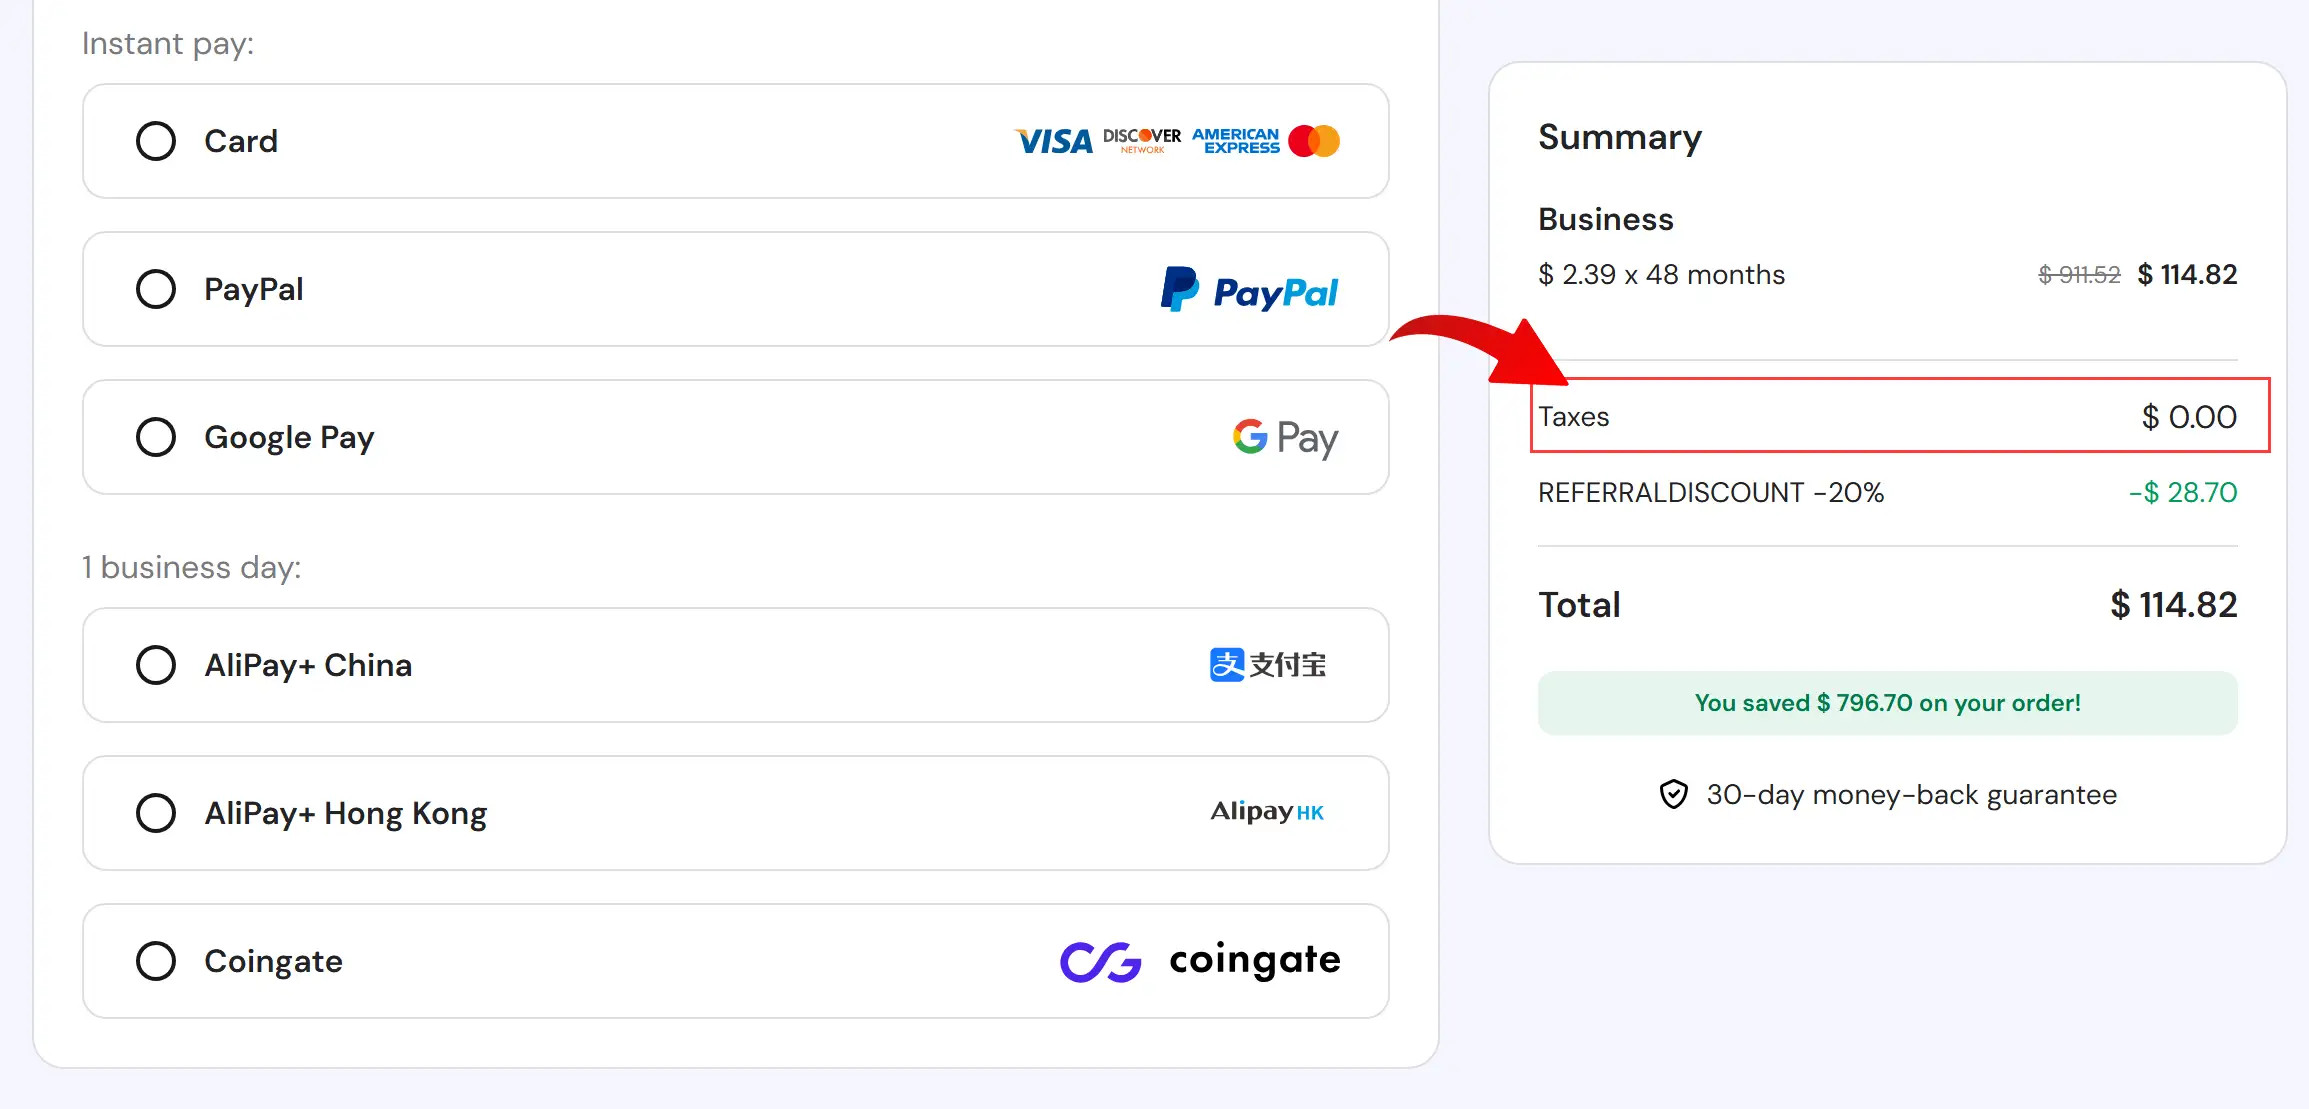
Now, you can choose your payment method, such as Visa or PayPal.
After completing the payment, Hostinger will redirect you to the hPanel dashboard, where you’ll find an easy server setup interface to quickly set up your website.


This method works 100% and allows me to get an extra discount on Hostinger plans without paying any taxes.